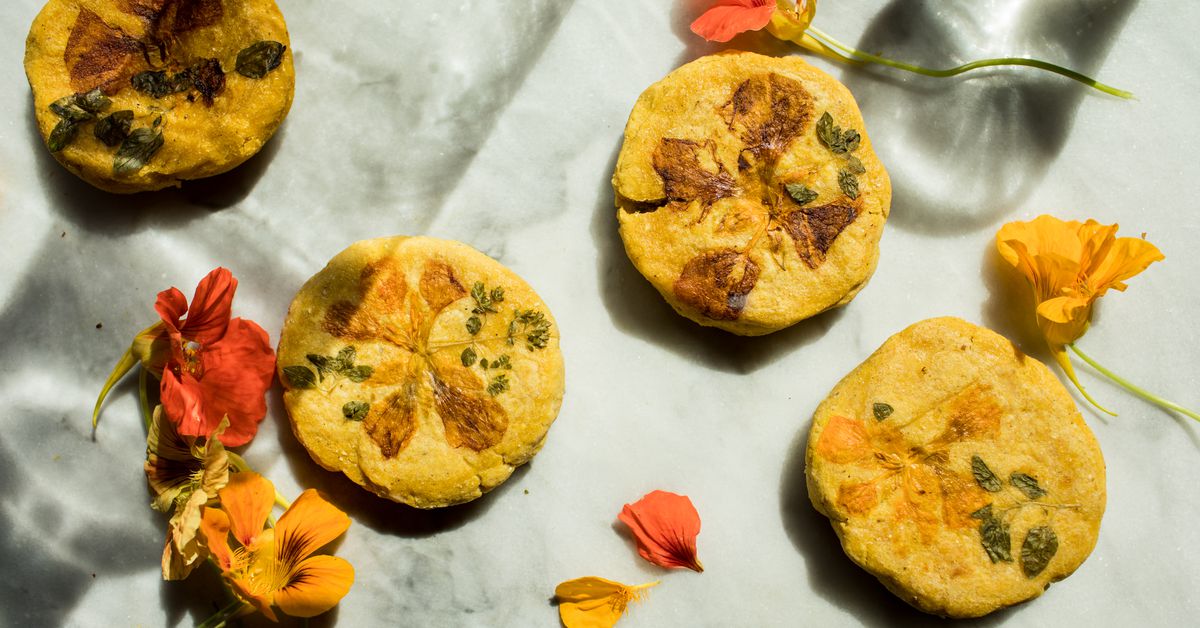
I have a lifelong relationship with arepas: I was born and raised in Venezuela, where arepas are not just a nutritious and comforting dish, but also one of the most important culinary legacies of the pre-Hispanic era.
One of the arepa’s many regional varieties is the arepa pelada; “pelar,” which means peeled, alludes to nixtamalization, the chemical process that results from cooking corn in water and hard wood ashes in order to dissolve and remove the skin of the corn kernel. Similar processes, with regional variations and names, were used by indigenous people across the continent to process different types of corn. Cooking the corn this way unlocks its nutritional value and gives the masa a distinctive flavor and texture that to me is somehow reminiscent of the Venezuelan countryside.
This pressed-herb-and-flower variation of the arepa pelada is an homage to these traditions and an artistic way to connect to small farming practices in Venezuela, where farmers plant corn for their own consumption surrounded by squash, beans, and a myriad of herbaceous plants that protect the crops from pests and create a natural chemical balance in the soil. This week, I demonstrated how to make it at an Eater event sponsored by Stella Artois.
The key, as I explained in my demonstration, is to start with good-quality masa. When time allows, I start from scratch by hulling the corn and grinding it into a fresh masa — while it’s a long process, it’s also very rewarding. When that is not possible, I use nixtamalized corn flours as a substitute. Here in the U.S., there are a number of good options made with different varieties of corn with distinctive flavors and textures, including Gold Mine, King Arthur, Bob’s Red Mill, Masienda, Corn Mafia and Alma Semillera. I prefer to use organic varieties as a way to preserve the integrity of the different types of native corn available across the continent.
Mastering the art of masa making for arepas is all about using your senses. The smell of the masa should be sweet and floral with notes of toasted corn, and the texture should be smooth and pliable; if it sticks to your hands, it’s too wet, and if it crumbles or cracks it’s too dry. Keep that in mind, and soon you won’t even need a recipe.
Once you get the hang of making masa, you can customize your arepas in all sorts of ways. For flavor, you can add cheese, vegetable purees, shredded vegetables, vegetable juices, or chopped herbs to the masa, and substitute milk or broth for the water. For extra fiber, you can add rolled oats or chia seeds.
Arepas are a perfect make-ahead food: if you’re serving a large crowd, you can shape the arepas in advance, place them on a tray, and keep them in the fridge, covered with a clean damp towel to prevent them from drying out. Or for an even quicker fix, you can sear the arepas and freeze them until you’re ready to eat, then pop them in the oven for about 15 minutes; they’ll make a hollow sound when they’re ready.
Arepas
Makes 4 arepas
Ingredients:
1 cup lukewarm water
½ teaspoon fine sea salt
1 ½ teaspoon neutral oil, such as grapeseed, sunflower, or canola
1 ½ cups pre-cooked corn flour (masa harina, do not use cornmeal or corn flour)
Neutral oil for cooking
Fresh herb leaves, edible flowers (optional)
Instructions:
Step 1: Preheat the oven to 450 degrees.
Step 2: Heat up a large pan over medium heat.
Step 3: Combine the water, salt and oil in a bowl. Slowly mix in the masa harina, kneading it with your hands, until you have a smooth and homogenous dough
Step 4: Let the dough rest for about 5 minutes. Don’t worry if the masa is too soft: the resting time will help hydrate the flour and improve consistency.
Step 5: Check on the masa and adjust the amount of water or flour if necessary. If the masa is too dry, it will look sandy and lumpy and will not stick together. If it’s too wet, it will stick to your hands. Different brands will have different hydration content, keep that in mind when adjusting. You’re looking for masa that is smooth and pliable.
Step 6: Divide the dough into 4 balls; they should be sized to fit in the palm of your hand. Form the balls into patties about ¾-inch thick and 3 ½ inches in diameter.
Step 7: Once the patties are ready, press the herbs and flowers into both sides of each patty.
Step 8: Add the oil to the pan and spread it evenly across the pan using a paper towel. Too much oil will prevent a caramelized crust from forming on the arepas.
Step 9: Place the patties in the pan and sear them until they’re a light golden brown on each side, about 4 minutes per side.
Step 10: Remove the arepas from the pan and put them on a baking sheet. Finish them in the oven for about 10 minutes; they should make a hollow sound when tapped.
Step 11: Cut open the arepas and stuff them with your choice of fillings. Serve them right away.
Mercedes Golip is a creative and curious cook. She runs My Kitchen, Farm to Table, a project featuring Venezuelan-inspired food made with local ingredients, with a focus on corn and making arepas traditionally.
Celeste Noche is a Filipino American food, travel, and portrait photographer based between Portland, Oregon, and San Francisco.
Recipe tested by Deena Prichep
